
-
A FREE 43 page Full Color eBook – Available in PDF and iBook Format (iPhone/iPad)
- 15 FREE HD Step by Step Videos
- 110 FREE Full Color Pictures
NOTE* All Park Tool pictures are courtesy of Park Tool. Thank you Park Tool!
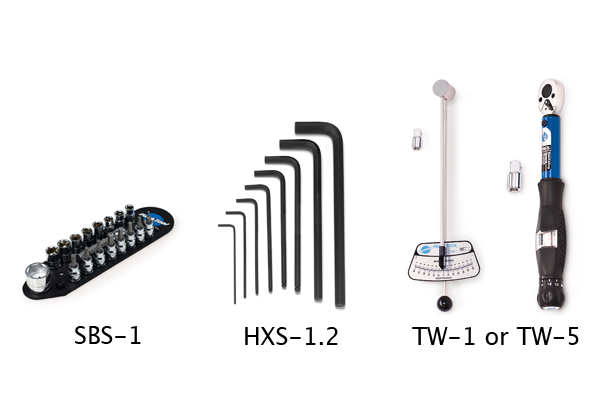
- Torque Wrench (TW-1 or TW-5)
- Socket and Bit Set (SBS-1)
- Hex Set (HXS-1.2)
 |
| Tools |
- Shifters
 |
| Parts |
- Be sure to completely unload both of your shifters. An unloaded shifter would put the chain in the small ring of the crankset and the smallest gear of your cassette. This will be necessary later on when you install the shift cables.
1. Roll back the hoods of your shifters to expose the handlebar clamp and bolt (see Figure 1).
 |
| Figure 1 |
2. Loosen your handlebar clamp bolt and slide the left hand shifter into place. Be sure to watch the video for positioning tips. Once the shifter is in place tighten the handlebar clamp bolt using a hex tool to secure the shifter to the handlebar (finger tight only) (see Figure 2).
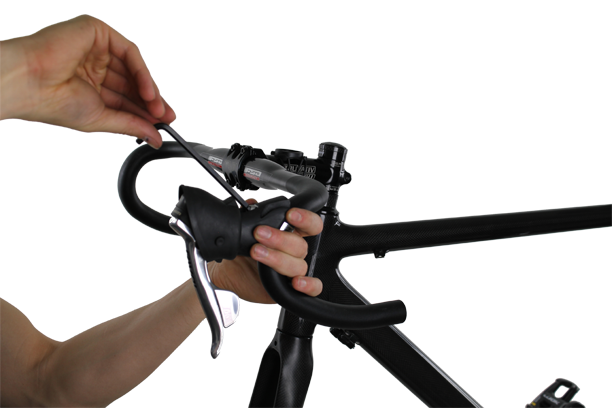 |
| Figure 2 |
3. Torque the handlebar clamp bolt to the manufacturers recommended value using a torque wrench (see Figure 3).
 |
| Figure 3 |
4. Repeat this process to install the right hand shifter.
5. You now have properly installed shifters (see Figure 4). Note: Keep your hoods rolled back for now. You’ll need to install cabling and bar tape first.
 |
| Figure 4 |

Co-founder at FLO Cycling. Jon manages the day to day operations and acts as the lead engineer for all FLO products.