
This is Step 3 of a multi-part series on how to build a road bike. There is a free eBook available that gives you instant access to the following:
-
A FREE 43 page Full Color eBook – Available in PDF and iBook Format (iPhone/iPad)
- 15 FREE HD Step by Step Videos
- 110 FREE Full Color Pictures
NOTE* All Park Tool pictures are courtesy of Park Tool. Thank you Park Tool!
To download the free eBook and videos please visit www.flocycling.com/buildabike.php and enter your email address.
To see Step 1, Installing your Bottom Bracket click here.
To see Step 2, Installing your Crankset and Pedals click here.
Step 3 – Fork, Stem and Handlebar
What you Need
Tools:
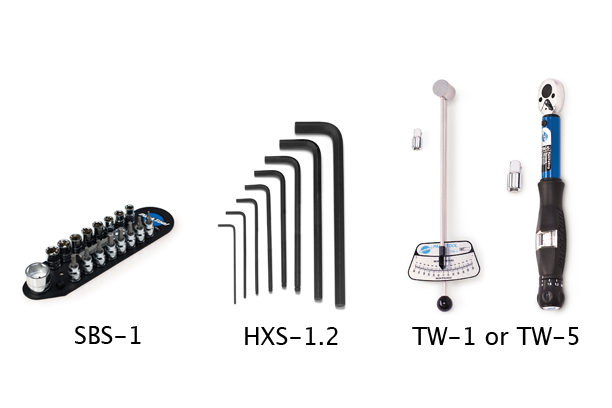
- Torque Wrench (TW-1 or TW-5)
- Socket and Bit Set (SBS-1)
- Hex Set (HXS-1.2)
 |
| Tools |
Parts:
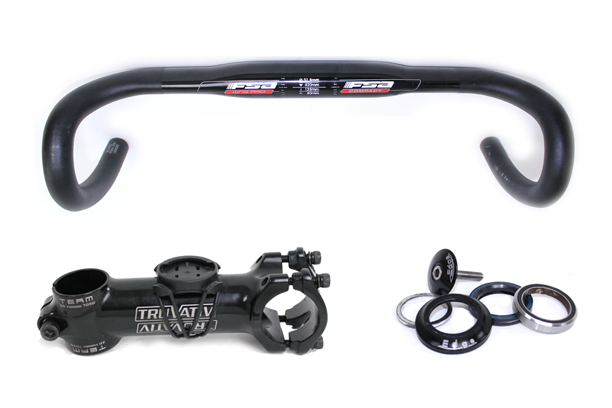
- Fork (Compatible with frame)
- Headset
- Stem
- Handlebar
 |
| Parts |
Before you Get Started
- Make sure you have a crown race properly press fit on your fork. If not, you can install one using a crown race setting tool or have a bike shop install one for you.
Installation
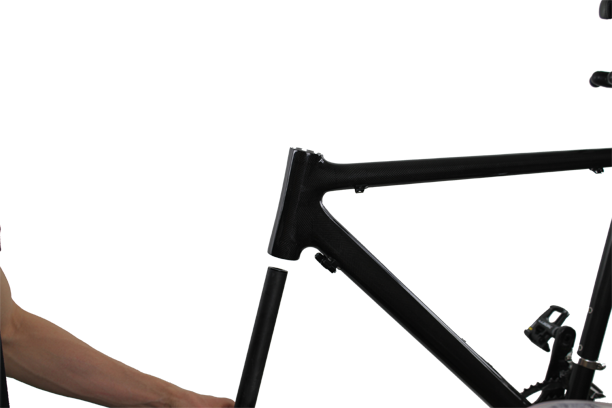
1. Place the lower headset bearing on the fork (beveled edge up) (see Figure 1).
 |
| Figure 1 |
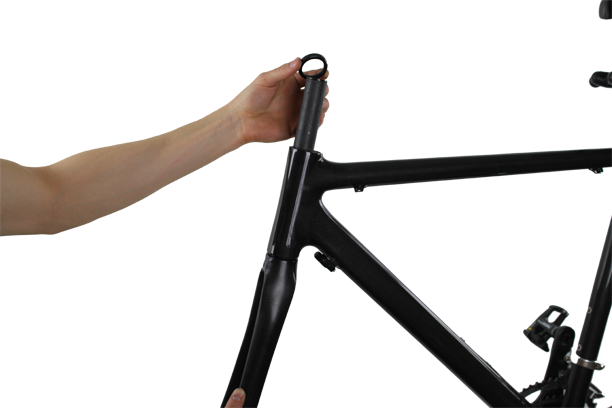
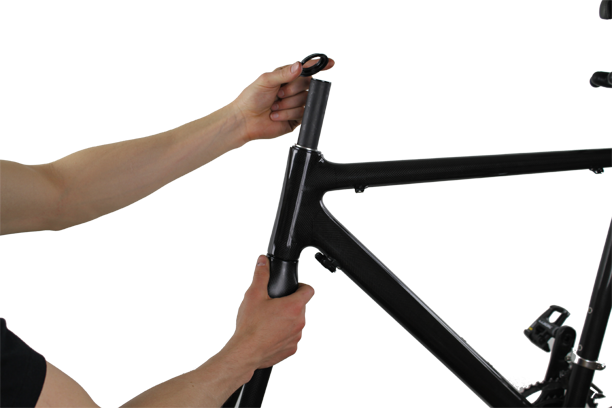
2. Insert the steer tube into the head tube of the frame (see Figure 2). Be sure the lower headset bearing seats properly.
 |
| Figure 2 |
3. Place the upper headset bearing on the steer tube (beveled edge down) and be sure it seats properly (see Figure 3).
 |
| Figure 3 |
4. Place the upper bearing race on the steer tube (see Figure 4).
 |
| Figure 4 |
5. Place the spacer(s) on the steer tube (if required, this is headset dependent)
6. Place the upper bearing cover on the steer tube (see Figure 5).
 |
| Figure 5 |
7. Install headset spacers on the steer tube if required to raise the height of the handlebars (see Figure 6). This ultimately depends on the type of fit you would like. You may want to consult with a professional bike fitter.
 |
| Figure 6 |
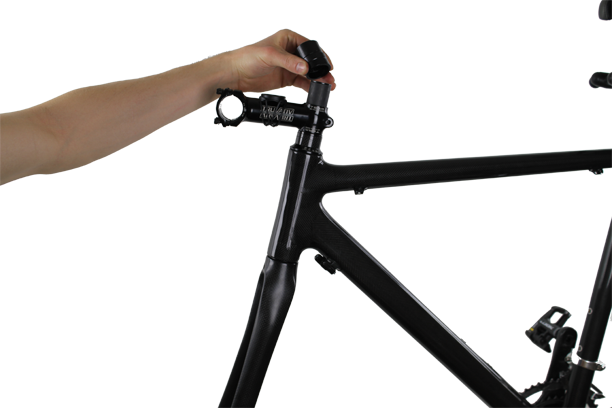
8. Place the stem on your steer tube (see Figure 7). Leave the stem clamp loose for now.
 |
| Figure 7 |
9. Place additional headset spacers on the steer tube if required (see Figure 8). It is often a good idea to place additional headset spacers on the steer tube to allow you to adjust your fit later on. Adding headset spacers now, will allow you to raise your handlebars in the future if needed. Not much is needed, ½” – 1” should be sufficient. Note: Make sure the top edge of your headset spacers or stem are slightly higher than the length of your steer tube. This is required to properly tighten the headset.
 |
| Figure 8 |
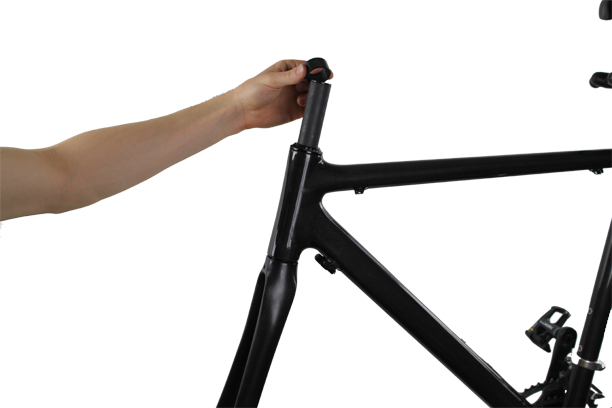
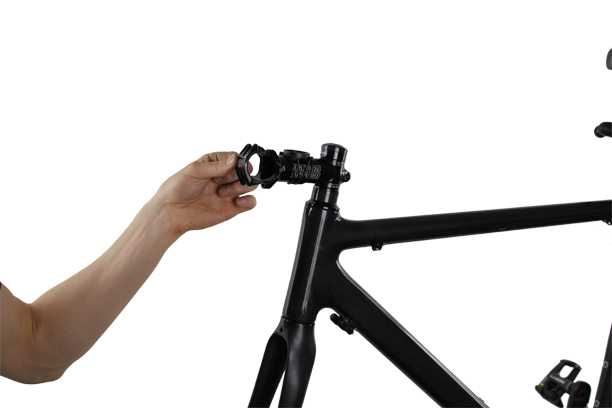
10. Place the headset cap on your steer tube and tighten the headset cap bolt into the star nut using a hex tool (see Figure 9).
 |
| Figure 9 |
11. Before setting the final torque on your headset cap bolt, make sure your stem is aligned straight with respect to the frame. Once everything is properly aligned torque your headset cap bolt to the manufacturers recommended torque value.
12. Tighten the steer tube clamp bolt(s) on your stem to secure it to the steer tube. Be sure to follow your stem manufacturers recommended torque value.
13. Remove the faceplate of your stem in preparation for installing the handlebar (see Figure 10).
 |
| Figure 10 |
14. Place your handlebar into the handlebar clamp and put the stem faceplate back into place (see Figure 11). Note: If you are using a carbon stem or handlebar, it may be beneficial to use “carbon fiber glue”. Carbon fiber stems and handlebars often have torque ratings to low to prevent the handlebar from being held securely in place. Carbon fiber glue helps create a better bond and prevents handlebars from shifting out of place.
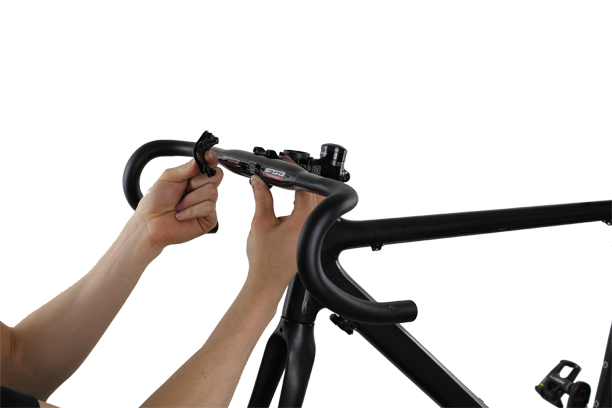 |
| Figure 11 |
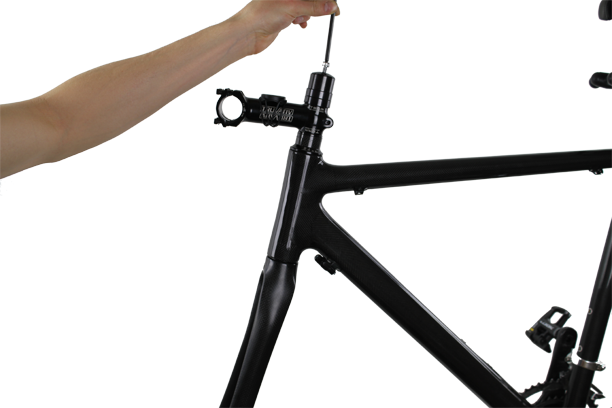
15. Tighten your stem faceplate bolts using a hex key (finger tight only) (see Figure 12).
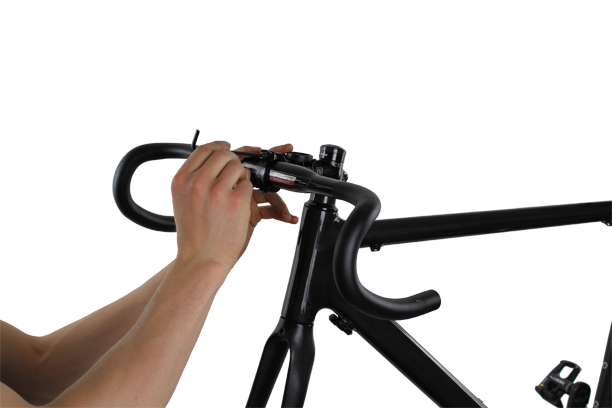 |
| Figure 12 |
16. Torque the faceplate bolts to the manufacturers recommended torque value using a torque wrench.
17. You now have a properly installed fork, headset, stem and handlebar (see Figure 13).
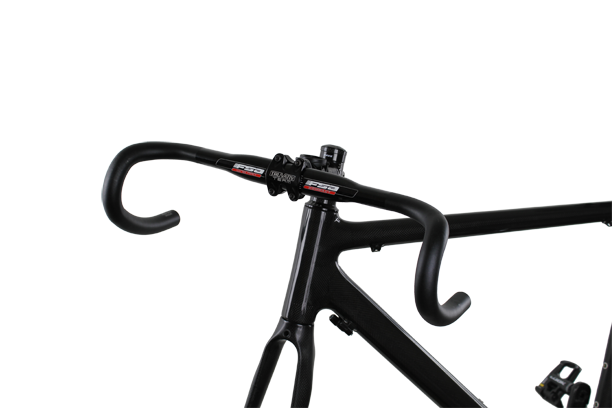 |
| Figure 13 |
This completes the installation of your fork, stem and handlebar.
We hope you enjoyed this how-to article. For more great content, please register for our free monthly newsletter at the top of the column on the right. We send links to all the articles we post during the month.

Co-founder at FLO Cycling. Jon manages the day to day operations and acts as the lead engineer for all FLO products.