
This is Step 1 of a multi-part series on how to build a road bike. To gain access to all 15 steps immediately, visit www.flocycling.com/buildabie.php to download the following:
-
A FREE 43 page Full Color eBook – Available in PDF and iBook Format (iPhone/iPad)
- 15 FREE HD Step by Step Videos
- 110 FREE Full Color Pictures
NOTE* All Park Tool pictures are courtesy of Park Tool. Thank you Park Tool!
Step 1 – Bottom Bracket (GXP Type)
What you Need
Tools:
- Park Bottom Bracket Tool (Park BBT-19)
- Torque Wrench (TW-2 or TW-6)
- Park Polylube 1000 Lubricant (PPL-1)
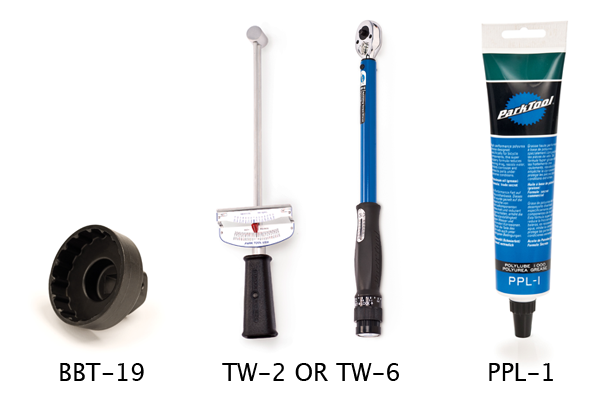 |
| Tools |
Parts:
- GXP Bottom Bracket
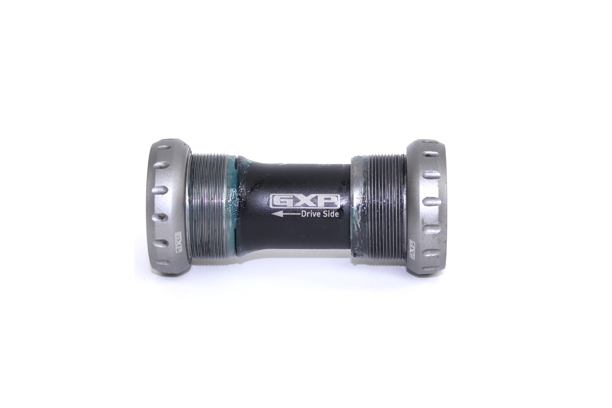 |
| Parts |
Before you Get Started
- Make sure your bottom bracket shell is properly threaded, and clean.
- If your bottom bracket shell is not properly threaded it is recommended that you take it to a bike shop to have it properly chased.
Installation (See the video below)
1. Apply a thin layer of lubrication to the bottom bracket threads of the bicycle frame (see Figure 1).
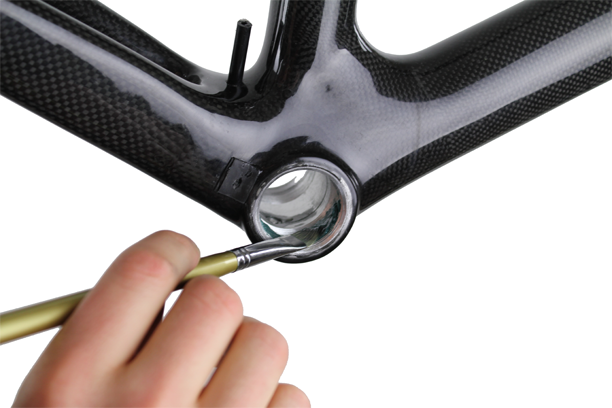 |
| Figure 1 |
2. Apply a thin layer of lubrication to the threads of the bottom bracket bearing threads (see Figure 2 & 3).
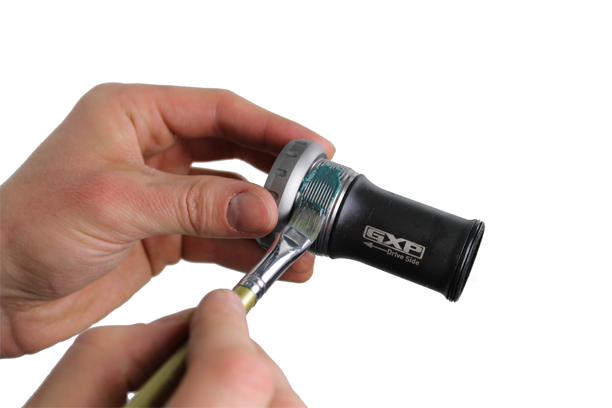 |
| Figure 2 |
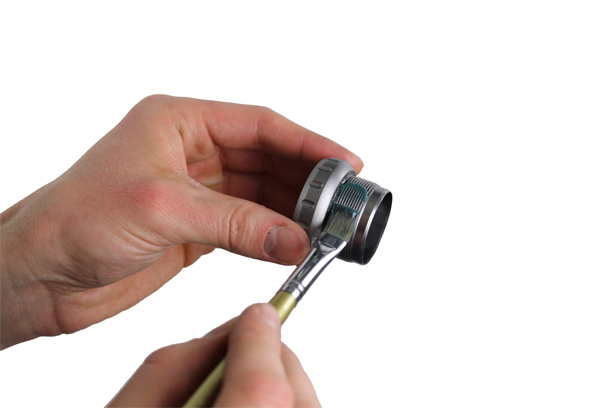 |
| Figure 3 |
3. Insert the drive side of the bottom bracket into the frame and get it finger tight (see Figure 4). If you are using an English thread bottom bracket (BSA), and you likely are since most production bikes sold in the USA have English thread bottom brackets, remember that the drive side of the bottom bracket has a reverse thread (counterclockwise to tighten). If by chance you are using an Italian thread bottom bracket, the drive side of the bottom bracket will have a standard thread.
 |
| Figure 4 |
4. Once the drive side of the bottom bracket is finger tight, tighten the bottom bracket to the proper torque using your bottom bracket tool and torque wrench (see Figure 5).
 |
| Figure 5 |
5. Insert the non-drive side of the bottom bracket into the frame and get it finger tight (see Figure 6). Both English thread bottom brackets and Italian thread bottom brackets have standard threads on the non-drive side (clockwise to tighten).
 |
| Figure 6 |
6. Once the drive side of the bottom bracket is finger tight, tighten the bottom bracket to the proper torque using your bottom bracket tool and torque wrench.
 |
| Figure 7 |
This completes the installation of your bottom bracket.
We hope you have enjoyed this “how to” article. For more great content, please register for our free monthly newsletter at the top right corner of this blog.

Co-founder at FLO Cycling. Jon manages the day to day operations and acts as the lead engineer for all FLO products.