
Wheel balance is an important aspect of cycling that affects the overall performance, comfort, and safety of the ride. When a wheel is out of balance you can experience a violent shake at high speed referred to as a “speed wobble” or “death wobble.” Wheel imbalance also reduces stability, wastes watts, and potentially leads to premature wear of components such as tires and bearings.
Most people never realize that cycling wheels are normally out of balance. The two scenarios that alert people to a wheel out of balance are:
- Spinning a cycling wheel while the bike is on the bike stand and the stand bounces up and down. Customers ask us why the bike bounces all the time.
- You reach a high speed on the bike and the bike begins to violently shake. This is the same phenomenon as a car when a wheel is out of balance and you travel at a high speed.
Before we dive into our favorite method for balancing a wheel, let’s delve into the causes and forces involved in wheel balance.
Causes of Cycling Wheel Imbalance
Wheels can go out of balance due to various reasons:
- Uneven weight distribution: If the weight is not evenly distributed around the wheel, it can result in an imbalance. This is most often caused by a long valve stem or tubeless valve in a deep carbon wheel.
- Tire irregularities: Imperfections in the tire, such as bulges or uneven tread wear, can cause imbalance.
Forces Exerted When a Cycling Wheel Is Out Of Balance
When a wheel is out of balance, several forces come into play:
- Centripetal force: As the wheel rotates, an unbalanced mass exerts a centripetal force that pulls the wheel towards the heavier side.
- Angular momentum: The angular momentum generated by the spinning wheel amplifies the effects of imbalance, causing vibrations and instability.
How to Balance a Cycling Wheel
To correct wheel balance, you can follow the steps below. Check out the video above to watch the full walk-through on YouTube. You will need a scale, Fun Tak, and Golf Weights as pictured below.


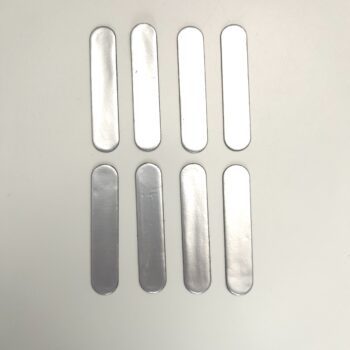
- Place the wheel in a wheel stand or in the frame of a bike mounted in a bike stand. In the case of a tubeless wheel install, install the tubeless valve in the bare rim without tubeless tape or a tire. If you are using a tube, install the tube and tire.
- Spin the wheel and locate the heavy spot of the wheel by noticing where the wheel settles at the bottom of the rotation. ie. If a valve stem is the heavy spot it will settle at the bottom.
- Place putty on the rim in 1 gram pieces opposite (180 degrees) from the heavy spot.
- Re-spin the wheel and see if the wheel settles with a heavy spot.
- Repeat steps 3 and 4 until the wheel spins for a long time without settling in any specific location when it stops.
- Remove the putty and weigh it on a scale. Once you have the final weight, remove the tire and rim strip and add golf weights to the rim in the same location that the putty was located. If you need several golf weights, add them evenly away from the putty location in either direction. You may need to add a bit more weight since the weights are moving away from the center. In the video we added 2 additional grams.
- Retest to make sure the wheel spin with out settling.
- Add back you rim strip or tubeless tape, install your tires, and enjoy balance wheels.
Final Thoughts
When you move to a deep wheel line the FLO 49 AS, FLO 64 AS, or FLO 77 AS, wheel imbalance becomes more common due to the long valve stems and tubeless valves used. While you may not notice the imbalance, a balanced wheel will reduce vibration, increase stability, conserve watts, and preserve your bearings. It can take some time to balance a wheel but it is a must if wheel imbalance is giving you trouble and a worthwhile option if you are looking for every speed advantage you can get.

Co-founder at FLO Cycling. Jon manages the day to day operations and acts as the lead engineer for all FLO products.