
The first time we visited the A2 Wind Tunnel we were under the assumption that testing a wheel was a simple as placing it in the wind tunnel and reading the results. What we didn’t know was that there were a large number of things that can alter the results. We also didn’t really know how to perform a wind tunnel test since there is no standard way to test a wheel. Each company defines their testing protocol. After getting over this initial learning curve, we did our best to define how we test wheels so that it’s clear to whoever is reading the results. I wanted to write this article to discuss the things I’ve learned through experience. This will be part one of a two-part series. If you ever find yourself in a wind tunnel or you are reading wind tunnel results, the lessons below may help you bypass some of the learning curve I went through.
How A Wind Tunnel Works
A wind tunnel has a testing section which is not connected to the rest of the wind tunnel. The brown section in the picture below is the testing section.
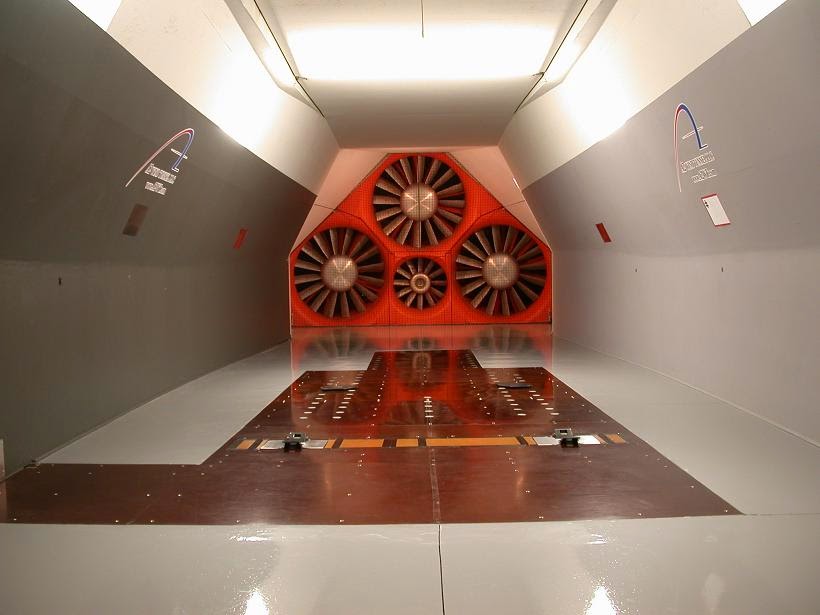
The reason it is not connected is so that it moves freely as the air passes over the test object. Good wind tunnels use test sections that have six degrees of freedom. If you are unfamiliar with what six degrees of freedom means, I’ve created a short video to help you understand.
In order to measure the force created by the moving air (drag force), the test section houses a number of force sensors. When the test object is mounted to the testing section, it enters the air stream. As the air interacts with the test object, it creates forces that are transferred to the free moving testing section and read by a computer. The computer records the measurements gathered by the force sensors and then computes the drag. It’s also important to note that anything on the test section will change the results. For example, if you were standing in on the test section with your wheel you would change the drag. Even a mouse would have an effect.
Lesson 1: The Truth About Tare
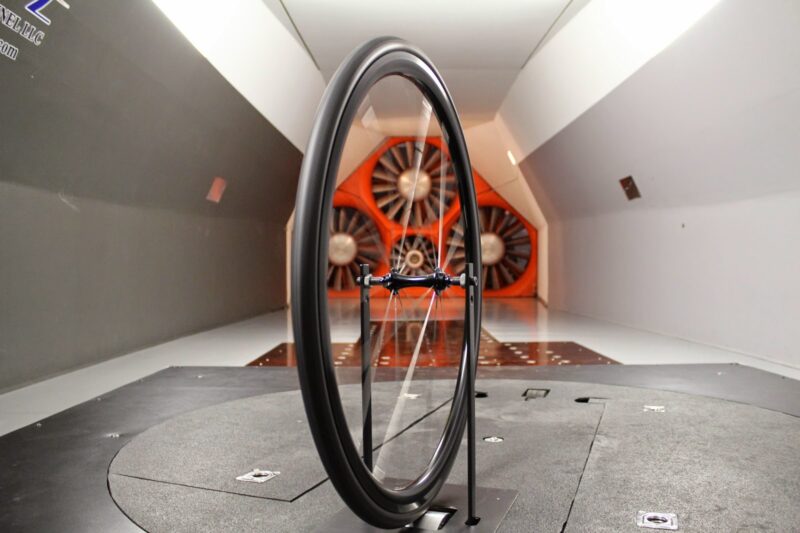
When testing objects in a wind tunnel you need to hold them in place. A bicycle wheel, in our case, needs to spin, so something that looks like an upside-down fork is used. That upside-down fork will also create drag. This additional drag is called tare.
Definition of Tare – “an allowance made for the weight of the packaging in order to determine the net weight of goods.”
Since weight and drag are both forces they can be replaced. The package weight is equivalent to the drag produced by the mounting fixture.
The picture below should help with a visual.
Well this raises an obvious question. When we test our object do we remove the drag created by the mounting fixture? The quick answer is yes, but you have to think about it for a minute. Let me explain why. When you test cycling products in a wind tunnel, you run them through a sweep. This means that you turn the object in the airstream to simulate air hitting the object from a different angle. When the object is straight into the airstream we are at angle zero. If we rotate five degrees, we say the wind is hitting the object at a yaw angle of five degrees. The pictures below will help with a visual.
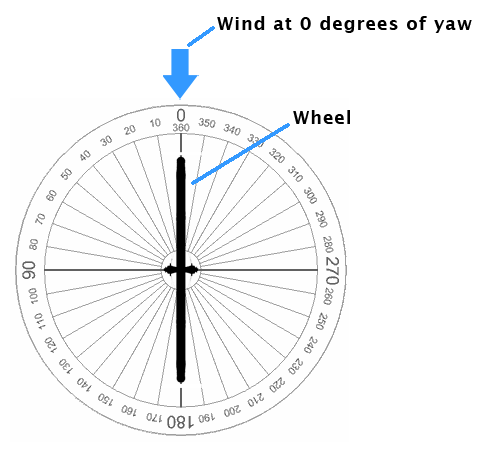
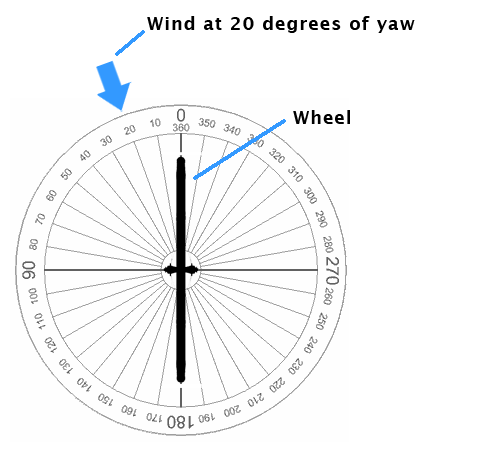
At zero degrees the air sees all of the mounting fixture. Note: When I say the air “sees” something I mean that it is in the path of the air. For a visual example, think of someone squirting you with garden hose. When the water hits you it “sees” you. If you were to stand behind a wall blocking the water from hitting you, the water would not “see” you. When testing a wheel like a disc, one of the sides of the mounting fixture moves behind the wheel as you increase the yaw angle. If you were to turn the wheel 90 degrees into the air stream, one half of the fixture would be directly behind the wheel and out of sight of the air. Removing the tare here isn’t entirely a fair representation because when you run the mounting fixture by itself the disc is not in the way. This leaves you with the option to calculate the drag created by the mount by testing it alone in the tunnel. These drag values can then be subtracted from the drag value of the object you are testing.
So we are left with a bit of a dilemma. If we remove the tare we can potentially make the wheel look better than it is. If we don’t remove tare then we potentially make the wheel look worse than it is. The best way, in my opinion, is to clearly explain what you have done and make sure you keep it standard for each test. Don’t treat the baseline wheel any different then the wheels you’re testing.If we compare apples to apples and it’s explained, the reader has a clear picture of what’s going on. I encourage those testing to spell out their testing protocol. As a company, we chose to remove tare. That being said, I don’t think one is necessarily better then another unless you plan to change the mounting fixture.
When you are reading future wind tunnel data or heading to the tunnel on your own, make sure you keep this in mind.
Lesson 2: When and When Not To Compare Data
Wind tunnels are great for comparative studies. Testing one wheel versus another with the same testing protocol gives us a good indication of which creates less drag. The same would apply to one person riding a bike in two different positions. This is why wind tunnel fitting makes a lot of sense. The rider is continually tweaked and the results are compared. Eventually you find a fast, comfortable and efficient position that is optimal.
Wind tunnels are not good when you compare results from two different studies or you look at the results from someone else and assume they will work for you. It’s a known fact that the best aero helmet on one person may be terrible on someone else. Don’t get caught up in the marketing. If you keep in mind that a wind tunnel should be used for comparisons you will be able to weed through a bunch of the marketing. For more on wind tunnels used for marketing, feel free to read my blog article.
That’s it for today. You can check out Part II here. you can sign up for all of our blog content by signing up in the box at the top right of this page. Please feel free to comment and ask questions below.

Co-founder at FLO Cycling. Jon manages the day to day operations and acts as the lead engineer for all FLO products.